React Core
In this section, we will discuss the core API of React.
JSX
You do not need JSX to use React, as I’ve shown you in previous section. However, JSX would make your code a bit more readable.
Let’s convert Movie component to using JSX. It will look like this:
import * as React from 'react';

const Movie = (props) => (
  <div className="movie-container">
    <h1>{props.name}</h1>
    <h2>{props.releaseDate}</h2>
  </div>
);

export default Movie;- Personally, I feel this is more readable. You may feel uncomfortable to introduce HTML in Javascript, I invite you to give it a shot until the end of this workshop.
- Comparing with the previous code, now you know what actually JSX does — it is just translating those HTML tags into
React.createElementcalls. That’s it. - Note the strange
{props.name}syntax: this is how you output Javascript expression. It you take away{}, it will literally output the stringprops.name. - Notice you still have to import React despite React not being explicitly used. As JSX is compiled to
React.createElement, anywhere you use JSX, you need to import React. However, ESLint doesn’t understand this relationship by default, thus it is yelling at you that “React is defined but never used”. We will fix this later.
So now JSX is demystified a bit, let’s go convert App and index.js.
class App extends React.Component {
  render() {
    return (
      <div>
        <div className="title-bar">
          <h1>React Movie App</h1>
        </div>
        <Movie name="Aquaman" releaseDate="2018-12-07" />
        <Movie name="Bumblebee" releaseDate="2018-12-15" />
        <Movie name="Fantastic Beasts: The Crimes of Grindelwald" releaseDate="2018-11-14" />
      </div>
    );
  }
}ReactDOM.render(<App />, document.getElementById('root'));- Notice that why first letter of
Movieis capitalized. It must be. If you make it lowercase, it will try to havemovieas a web component and not a React component. - We now pass props down as we add attributes to an HTML tag.
Configure Babel to compile JSX
If you try to compile the code by running npm run build now, it will throw SyntaxError. This is because Babel does not recognize JSX by default since JSX is not part of Javascript — it’s just a syntatic sugar introduced to make React code more readable.
Therefore, we need to configure Babel so that it will recognize JSX and compile them to React.createElement calls.
- run
npm install -D @babel/preset-react - add
@babel/preset-reactinto.babelrcpresets.{ "presets": ["@babel/preset-env", "@babel/preset-react"] }
Now when you start webpack-dev-server, the compilation should succeeds and your app should work as before.
Exercise
- Update
index.js,app.js, andmovie.jsto use JSX as described above. - Configure Babel to compile JSX.
- Restart webpack-dev-server and verify that the application still works as before.
Commit: 070-jsx-config
React States and Lifecycle Methods
Our current app is too simple, as it’s just rendering a list of movies. In an actual webapp, our application need to be more complex, e.g.:
- hide some information by default to declutter your page, but allow user click to show more
- loading data from backend api, and showing loading indicator while waiting for response
We will do that by using React states and lifecycle methods
Use React States to track UI states e.g. show/hide
Let’s assume the design of our app is to display “React Movie App” title and a “Show Movies” button only by default. When user clicks the button, the movies will be shown.
To achieve that, let’s modify our App component to:
class App extends React.Component {
  constructor(props) {
    super(props);
    this.state = {
      showMovies: false,
    };
    this.showMovies = this.showMovies.bind(this);
  }

  showMovies() {
    this.setState({
      showMovies: true,
    });
  }

  render() {
    let movies;

    if (this.state.showMovies) {
      movies = (
        <React.Fragment>
          <Movie name="Aquaman" releaseDate="2018-12-07" />
          <Movie name="Bumblebee" releaseDate="2018-12-15" />
          <Movie name="Fantastic Beasts: The Crimes of Grindelwald" releaseDate="2018-11-14" />
        </React.Fragment>
      );
    }

    return (
      <div>
        <div className="title-bar">
          <h1>React Movie App</h1>
        </div>
        <div className="button-container">
          <button onClick={this.showMovies} className="button">
            Show Movies
          </button>
        </div>
        {movies}
      </div>
    );
  }
}- We declare
constructorfor ourAppand initialize our state withthis.state = { showMovies: false }. Note that I’ve told you previously that class component is more powerful, and state is one of the functionality that only available for class component (at least for now). - React state should always be a plain Object, while the value of the properties it totally up to you.
- Because
thisis dynamic in Javascript, we need to bindthiskeywords inshowMoviesmethods to the component with the following code:
(This binding is required for each custom method that you define for React component. I will show you how to avoid those tedious repetitions slightly later.)this.showMovies = this.showMovies.bind(this); - We declare a
showMoviesmethods, which will callthis.setState.setStateis a method that is available to all React class component (the component inherit this method viaextends React.Component), and it’s only way for you to update states. If you update state directly (this.state.showMovies = true), React will not be notified that the state has been change and thus will not re-render your component, then what is displayed will be incorrect. - When we call
setState, React will merge the object we provide it with its current state, then it will rerender the component. - In the
rendermethod, we create abuttonelement which will callshowMoviesmethod when it is clicked. - Besides, we declare
moviesvariable inrendermethod, which be a list of movies ifthis.state.showMoviesis true.React.Fragmentis a container that renders nothing but allows you to wrap a list of React elements.
Before we proceed, there is some cleanup that I want to suggest:
- Get rid of
moviesvariable and just inline it with&&expression. - You can replace
React.Fragmentwith<>, Babel would understand that<>is actuallyReact.Fragment. I prefer this way, as this expresses whatReact.Fragmentreally is — an empty container.
The App component should be as below now:
class App extends React.Component {
  constructor(props) {
    super(props);
    this.state = {
      showMovies: false,
    };
    this.showMovies = this.showMovies.bind(this);
  }

  showMovies() {
    this.setState({
      showMovies: true,
    });
  }

  render() {
    return (
      <div>
        <div className="title-bar">
          <h1>React Movie App</h1>
        </div>
        <div className="button-container">
          <button onClick={this.showMovies} className="button">
            Show Movies
          </button>
        </div>
        {this.state.showMovies && (
          <>
            <Movie name="Aquaman" releaseDate="2018-12-07" />
            <Movie name="Bumblebee" releaseDate="2018-12-15" />
            <Movie name="Fantastic Beasts: The Crimes of Grindelwald" releaseDate="2018-11-14" />
          </>
        )}
      </div>
    );
  }
}
Use Class Properties Syntax
It is tedious and error-prone to remember and write the binding for each of your component methods. Luckily, you could use the class properties syntax.
Convert your App component as below:
class App extends React.Component {
  state = {
    showMovies: false,
  };

  showMovies = () => {
    this.setState({
      showMovies: true,
    });
  };

  render() {
    // current code
  }
}
This is much more terse than previous code. However, you would see some compilation error now because class properties is still at proposal phase and it is not included as part of preset-env nor preset-react. To make babel understand additonal syntax, we need to install plugin to “teach” it to parse the syntax.
-
Install the babel plugin:
npm install -D @babel/plugin-proposal-class-properties -
Update
.babelrcas below:{ "presets": ["@babel/preset-env", "@babel/preset-react"], "plugins": ["@babel/plugin-proposal-class-properties"] } -
Restart webpack-dev-server.
Your code should works now, but with terser code.
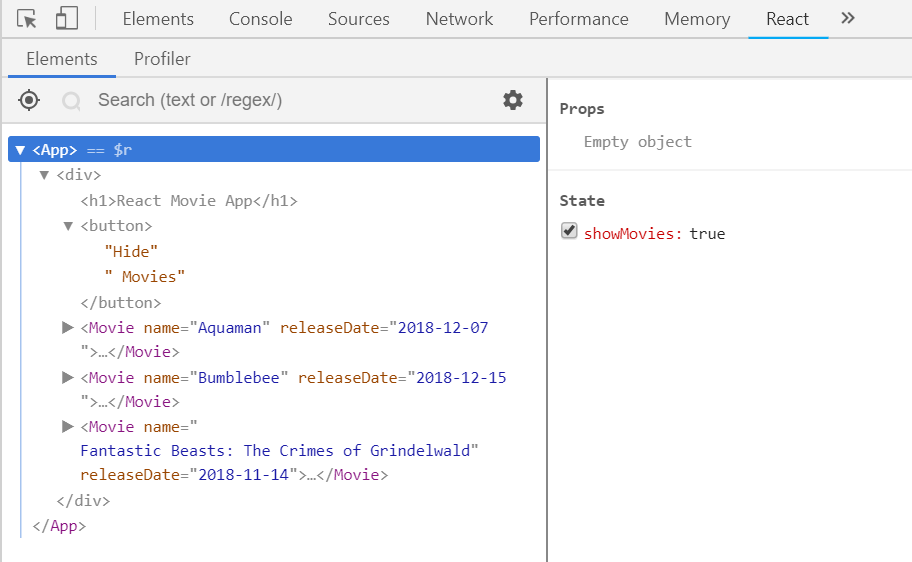
React DevTools
One last thing before you write your code, install browser extension for React DevTools. The extension will add a new tab in your browser Devtools with title “React”, which you can used to inspect your React component props and states.
Exercise
- Install React DevTools.
- Configure babel to parse class properties syntax.
- Modify your
Appcomponent to show movies only when clicked as described above. - Verify that the application works as expected.
Commit: 080-hide-movies
Configure ESLint for React App
Currently ESLint is having parsing error. Let’s configure ESLint before proceed further.
- install required packages
npm install -D eslint-plugin-react babel-eslint - update
.eslintrc:
{
  "extends": ["eslint:recommended", "plugin:react/recommended", "prettier", "prettier/react"],
  "plugins": ["react"],
  "rules": {
    "react/prop-types": 0
  },
  "parser": "babel-eslint",
  "parserOptions": {
    "ecmaVersion": 2016,
    "sourceType": "module",
    "ecmaFeatures": {
      "jsx": true
    }
  },
  "env": {
    "es6": true,
    "browser": true,
    "node": true
  },
  "settings": {
    "react": {
      "version": "16.7"
    }
  }
}plugin:react/recommendedare set of rules included as part ofeslint-plugin-react.reactis added to theplugins, in which ESLint will lookupeslint-plugin-react. This plugin “teach” ESLint to recognize all the JSX are usingReact.createElementunder the hood, so it doesn’t showReact is not being usederror.babel-eslintis specified as the parser. This allows eslint to use babel to parse the code, which will process the code based on our.babelrcconfig.- React version is added to
settings, in whicheslint-plugin-reactdepends on to suggest applicable rules. react/prop-typesrules is overwritten, as we’re not going to useprop-typesin this workshop. I personally think that prop-types does not worth the investment — I recommend Typescript if you want to introduce type-checking in your project.
Exercise
- Configure ESLint as described above.
- Run
npm run lintand verify that no more linting error is shown.
Commit: 090-eslint-react
More on setState
Our current hide-show functionality only allow us to show, but we can’t hide it after that. Let’s enhance it.
Modify App to be following:
class App extends React.Component {
  state = {
    showMovies: false,
  };

  toggleMovies = () =>
    this.setState((prevState) => ({
      showMovies: !prevState.showMovies,
    }));

  render() {
    return (
      <div>
        <div className="title-bar">
          <h1>React Movie App</h1>
        </div>
        <div className="button-container">
          <button onClick={this.toggleMovies} className="button">
            {this.state.showMovies ? 'Hide' : 'Show'} Movies
          </button>
        </div>
        {this.state.showMovies && (
          <>
            <Movie name="Aquaman" releaseDate="2018-12-07" />
            <Movie name="Bumblebee" releaseDate="2018-12-15" />
            <Movie name="Fantastic Beasts: The Crimes of Grindelwald" releaseDate="2018-11-14" />
          </>
        )}
      </div>
    );
  }
}- Button content has been enhanced to show different text based on the state. As explained previously, we need
{}to code JS expression, else it would be treated as string. showMoviesmethod is renamed totoggleMoviesand its content changed. Now the parameters tosetStateis no longer an object but a function. This is because React may batch multiplesetStatecalls into a single update for performance. Therefore, if oursetStateis dependent on previous value of state, the correct way to callsetStateis to pass it a function, in which the parameters of the function would be the previous state (prevState).
In short, you can pass setState either of the following:
- the change that you wish React to apply (use this if the new value doesn’t depends on previous value), OR
this.setState({ show: true }); - a function that returns the change (use this if the new value depends on previous value)
this.setState((prevState) => ({ show: !prevState.show }));
Another things about setState that may surprise React beginner is that it is asynchronous, which means that when you call setState, the state will not be updated straight-away (you can verify this by adding console.log(this.state) after setState call). If you want to perform some action whenever state is updated, you can provide a callback as second parameter to setState:
this.setState({ show: true }, () => {
  // this will only be called after React apply the state change
  console.log(this.state);
});
Exercise
- Enhance your
Appcomponent to show/hide movies when button is clicked and display different button text, as described above. - Verify that the application works as expected.
Commit: 100-toggle-movies
Getting Data from Backend API
Currently our movies data are hardcoded in our App:
<>
  <Movie name="Aquaman" releaseDate="2018-12-07" />
  <Movie name="Bumblebee" releaseDate="2018-12-15" />
  <Movie name="Fantastic Beasts: The Crimes of Grindelwald" releaseDate="2018-11-14" />
</>
Let’s load these data from backend API instead.
React doesn’t dictate how you get data from backend, it’s up to you to decide what library you want to use the make AJAX call to your backend API.
Common options:
window.fetch- no library required as it is supported by all modern browsers. However, polyfill required to support older browser- Axios - Promise based HTTP client.
- jQuery AJAX - good option if JQuery is already included in your page, else bad option as it doesn’t make sense to include whole JQuery library for one function only.
For this workshop, I will use Axios as example, but feel free to use other library that you prefer.
I’ve created a backend API. Open this link to see its content. We will utilize this API for this exercise.
To load data from backend API:
-
install the ajax library of your choice, e.g.
npm install axios. -
create a file and name it as
api.jswith the following content: (actual code may differs based on the ajax library that you use)import axios from 'axios'; export const loadMovies = () => axios('https://react-intro-movies.herokuapp.com/movies').then((res) => res.data); -
modify your
Appconstructor and define acomponentDidMountmethod as below:import * as React from 'react'; import Movie from './movie'; import { loadMovies } from './api'; // highlight-line class App extends React.Component { state = { showMovies: false, movies: [], // highlight-line }; // highlight-start componentDidMount() { loadMovies().then((movies) => this.setState({ movies })); } // highlight-end }componentDidMountis one of the React component lifecycle methods.componentDidMountwill be called immediately after a component is mounted (inserted into DOM).- There are a few lifecycle methods that you can define to invoke functions at certain lifecycles of React component, e.g.
componentWillUnmount(which will be called before component is removed) andcomponentDidUpdate(which will be called when the props/states of a component has been changed). Read through the docs to get a rough idea what each method does, and refer back whenever you are unsure. - Verify in “Network” tab of your browser devtools an API call has been made. Inspect the state of your
Appwith React DevTools, and you should able to see themoviesstates is loaded with the data from the API.
-
Update
rendermethod of yourApp:class App extends React.Component { render() { return ( <div> <div className="title-bar"> <h1>React Movie App</h1> </div> <div className="button-container"> <button onClick={this.toggleMovies} className="button"> {this.state.showMovies ? 'Hide' : 'Show'} Movies </button> </div> {this.state.showMovies && this.state.movies.map((movie) => ( <Movie name={movie.name} releaseDate={movie.releaseDate} key={movie.id} /> ))} </div> ); } }- as
this.state.moviesis an array, we useArray.mapmethod to loop through the array and render a list ofMoviecomponent instances. - when you render a dynamic list of component, you need to provide a special props,
key.keyis used by React to identify a specific component instance so that it can decide whether an item need to be unmount or just reorder the dom whenever the list change.
- as
Touching Up UI by Adding Loading Indicator
Our app is able to load data from backend API now, which is great. However, there is some problem that is not obvious to us.
Once your page load and you quickly click “Show Movies” button, you may see no movies is displayed if that API is slow. For that, we should display a loading indicator if we waiting for the API response.
To show loading indicator when waiting API response:
-
create a file
busy-container.jsinsrcfolder with the following contents:import * as React from 'react'; export const BusyContainer = ({ isLoading, children }) => ( <div> {isLoading && <span>loading...</span>} {children} </div> );BusyContaineris a simple component that will render “loading…” text when itsisLoadingprops istrue. In an actual application, you may want to add some fancy spinner svg here.childrenis a special props for React components. It’s the contents within the JSX tags (if you remember, the third parameters toReact.createElement).
-
update
Appcomponent:import * as React from 'react'; import { loadMovies } from './api'; import { BusyContainer } from './busy-container'; // highlight-line import Movie from './movie'; class App extends React.Component { state = { showMovies: false, isLoading: true, // highlight-line movies: [], }; componentDidMount() { loadMovies().then((movies) => this.setState({ movies, isLoading: false })); // highlight-line } toggleMovies = () => { this.setState((prevState) => ({ showMovies: !prevState.showMovies, })); }; render() { return ( <div> <div className="title-bar"> <h1>React Movie App</h1> </div> <div className="button-container"> <button onClick={this.toggleMovies} className="button"> {this.state.showMovies ? 'Hide' : 'Show'} Movies </button> </div> {this.state.showMovies && ( // highlight-next-line <BusyContainer isLoading={this.state.isLoading}> {this.state.movies.map((movie) => ( <Movie name={movie.name} releaseDate={movie.releaseDate} key={movie.id} /> ))} {/* highlight-next-line */} </BusyContainer> )} </div> ); } }- we initiate state with additional props,
isLoadingand set it astrue. - when ajax call returns, we set
isLoadingtofalse. isLoadingis passed toBusyContaineras props.
- we initiate state with additional props,
Exercise
- Get the movie data for your
Appfrom backend API instead of hand-coding them. - Create
BusyContaineras described and use it in yourAppcomponent to show loading indicator. - Verify that the application works as expected.
Commit: 110-ajax-calls